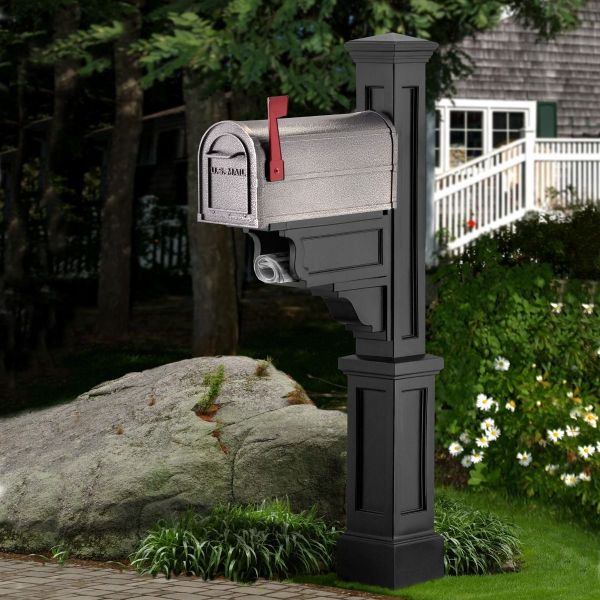
Mailboxes line our front yards serving as landmarks and mail collection boxes; however, their importance is hardly felt in their design. Mailbox posts are usually drab and boring, having the same appearance all across the street. Some mailboxes are hanging by a thread on their posts as they are worn and old but see no repairs since people often neglect them.
A little tweak of your mailbox post can change the entire look of your front yard and make mail deliverers and passersby take notice. You can change your mailbox post to something different by building a DIY post. There are many ways to build a mailbox post depending on factors like resources and style. Good thing; this is a small project and would rarely cost a lot of resources to build.
This guide contains several mailbox post designs to try out as a DIY enthusiast and catch the attention of neighbors and mail deliverers. So save yourself the hassle of thinking of mailbox post plans and select from the plans in this guide.
DIY Mailbox Post Plans
Are you a DIY lover? Would you like to do something different for your mailbox post? You’ll love the selection of mailbox post designs and plans we have here.
1. Cedar Mailbox Post

Cedar is known for its durability, so when you use it as a mailbox post, it is strong and can withstand harsh conditions. This post design is easy to replicate by even people with no experience as long as they have little tool experience, as tools like the miter saw and drill are important.
Other tools you’ll need for this post include a Kreg jig, shovel, clamp, level, and more. At the same time, the material list for the design includes 4 x 4 x 8 feet of cedar, glue, scrap boards, and screws, among other things.
The major pull of this idea is its durability and simplicity, as you can complete it in two hours, aside from staining and waiting for the post concrete to set. This cedar plan is a fantastic idea if you’re looking for a robust design with some stylish elements.
2. Stair Mailbox Post

Here is a stair post design with progressing steps from the ground up, with the largest stair carrying the mailbox. While the plan may seem complicated, it is simple as it features a single post lumber and numerous attachments of varying heights that make the stairs. First, you’ll need to cut out thin pieces to form the U-shaped attachments for the stairs. Luckily, the miter saw and a push stick can smoothly handle the task.
Complete the project by staining the post to the desired tone. You can experiment with the style of the attachments to make slightly different designs; however, you’ll need to make it easier to hold them to the main post already set in the ground.
3. Affordable DIY Mailbox Post

Sometimes you do not have to reinvent the wheel when making a post for your mailbox. Instead, you can utilize a common design idea to make a catchy mailbox post. This idea features affordable materials that will cost under $100 to build. The post comprises three woodcuts: the post length, the mailbox support, and the support bar holding the horizontal and vertical parts.
You can set it into concrete, but this is not necessary since the post is not heavy; however, if your area is prone to strong winds, it would be best to secure it firmly in concrete. Next, stain, and install the mailbox, securing it with long screws. You can also repaint the box to a more suitable color.
4. Mail house Post With Finial Top

You can make a post design and finish it with the finial piece of your choice. Adding a finial improves the appearance and makes the post more appealing. However, before the finial can shine, the post must have a clean build. You’ll need to drill the horizontal and vertical parts of the post together while bracing the two cuts with a 45-degree cut brace.
Use wood filler to cover any viable hole left after the completion of the project and ensure it dries without staining or painting. Depending on the type of wood you use, you can enjoy the natural wood feel without any additional stain. Finials come in different designs so that you can choose from various styles.
5. Classy Paneled Mailbox Post

Classiness can be embedded in almost any project you build, including the mailbox post, by going beyond the traditional designs for something more exquisite.
Like most of the mailbox post plans, this affordable design costs under $100 and will require about 4 to 6 hours to complete. While this style is easy, it requires precision in joining panels and joints and cutting the parts.
You will need several tools for this, including the jigsaw, miter saw, drill, paint and paintbrush, and sandpaper, among other things.
Some parts, like the panels and brace, require special cuts, so you must have a good experience using these saws. A combination of a black mailbox and a white post has proven to be a powerful color combo, and you can utilize the same here. The white reaffirms the class in the design.
6. Pallet Post

The pallet continues to prove its usefulness as it serves as a post for your mailbox in this design. You can build your ideal pallet post to fit the size and height you need for your post, but the idea remains the same; wooden planks going side by side to form a stylish yet stable post. Here instead of a single post, it requires two, with planks on either side of the posts.
The design is more stable and will withstand heavy winds since it is wider with a double post firmly in the ground. You can paint with any color, with white being the most preferred.
You can also stain or leave it with its natural wood look. Secure the mailbox with long screws and print the number on the side of the box to make it attractive.
7. Horseshoe Post in Flower Bed

Here is a rustic mailbox post idea with a horseshoe around it to improve the rustic look. Traditional mailbox design is transformed by adding horseshoes nailed randomly on the post.
A finial is carved at the top of the vertical post while it is set in the ground through a stylish pan flower bed. The idea delivers a rustic post in a colorful flower bed design.
Implementing this idea to transform your old post into a rustic design using horseshoes and flower beds is quick and easy. This idea presents a way to utilize the shoes and create something charming if you have old horseshoes.
Also Read: 14 Easy DIY Planter Box Plans (Detailed Explanation)
8. Exquisite Mailbox Post

This design is your go-to option to create a truly awesome post that’ll turn heads and make the mail deliverer linger on your front post. It features a paneled post with a stylish brace that requires a lot of experience to craft. In addition, cutting and attaching the panels requires precision and expertise to deliver this classy post.
The gold touches in the design are the latest classy addition to this post design. The gold mailbox and number inscription on the vertical post fit the white paint perfectly, while the gold finial at the top is like the crown of this special design for a DIY enthusiast who values class.
9. Simple Mailbox Post

Make this simple mailbox design by following this guide showing all the necessary steps and materials. The simple and affordable design does not require a lot of resources, and anybody with tool experience will find it easy to complete.
It features a vertical post and a horizontal mailbox holder with no brace, so you need to secure the two parts properly. A socket joint style will give a stable joint and prevent bending. Also, buying a simple and lightweight mailbox will match the design and reduce the weight the mailbox has to carry.
Paint the post and mailbox white for an equally simple finish. You can add some final designs to the box, including your number. Secure in concrete to ensure long-term stability.
10. Modern Post With Light

Check out this modern mailbox design with impressive stability due to its wide area and double post. It features planks over both sides of the two posts; however, its most prominent feature is the light at the top that keeps the mailbox visible even at night. You will continue to enjoy this modern design even when it gets dark.
The design requires more resources than most others since the post is wider and requires power for the light. Finish a dark stain or paint to create a calm and satisfying feel around the mailbox.
Final Thoughts
Mailbox posts can look better with the right idea and motivation, which this post has rectified by providing different post designs anybody can make depending on experience level and resources. Luckily, mailbox posts are generally affordable to build, so you wouldn’t need to go out of budget to implement any of the plans here.
