

If you love to grill, you’ve most likely heard of the Kamado Joe grill. Kamado is a Japanese word that translates to “stove” or “cooking range.” A Kamado Joe table is where a sizable bowl-shaped pot or cauldron is used over an open flame.
Kamado is a versatile pot with good stability and even better temperature control, with its height helping it maintain temperature. With Kamados, you can grill, smoke, bake, roast, sear, and barbecue meals, and this is why it is so popular, especially in outdoor cooking setups. To comfortably use this oval-shaped pot, you’ll need a stand.
The suitable Kamado stand should hold the pit firmly, raise it to a comfortable height off the ground and provide some room around it for cooking. This is why a Kamado table is often preferred to a tripod.
Building a Kamado table as a DIYer is an exciting project and shouldn’t deter you even without prior experience. We’ll show several free Kamado Joe table plans to build or use as inspiration.
Materials And Tools Required
Kamado tables are typically made out of wood, with their design looking like a grill stand some DIYers already have experience building. The tools and materials you need for this project should be design and style based; however, we provide a general list for Kamado Joe tables.
Tools
- Level
- Sander
- Router
- Chisel
- Clamps
- Marker or pencil
- Circular saw, and table saw
- Miter saw, or hand saw
- Tape measure
- Drill and drill bits
- Screwdriver
- Safety equipment
Materials
- Cedarwood or pressure-treated lumber
- Casters or wheels (optional)
- Stain, paint, or wood finish
- Plywood or medium-density fiberboard
- Wood glue
- Exterior-grade screws
- Stainless steel hinges
- Hardware and accessories
DIY Kamado Joe Table Plans
Are you a DIY enthusiast looking to make a befitting table for your Kamado Joe pot? We understand how confusing it may be to differentiate Kamado from other grilling options. This is why we’ve compiled free plans on building Kamado tables. These DIY plans vary based on style, materials, ease, and attractiveness, so consider all these before choosing a project to follow.
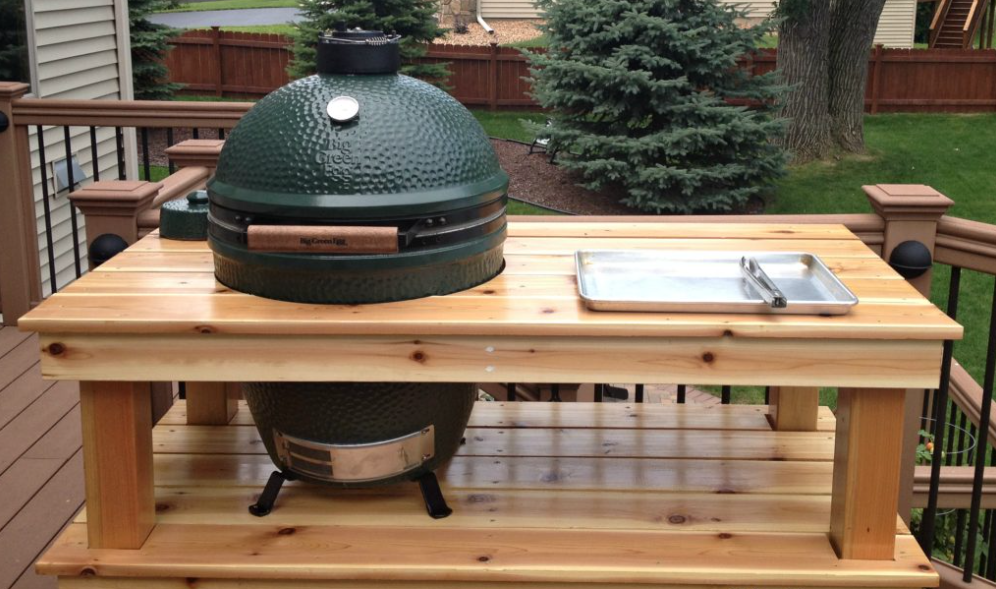
1. Rough Cut Cedar Kamado Table

The Kamado grill table is made using rough-cut cedar wood planed and coated with several layers of exterior finish before assembling. Cedar has a good outdoor capacity, but a few layers of finish will preserve the excellent wood tone cedar possesses.
The design features a simple project which only bare essentials like a cooking surface by the side and a storage shelf underneath. The rack is open, which saves materials and makes following the plan straightforward.
Cutting out the grill circle on the top piece can be challenging, but this plan includes using a makeshift compass to mark the correct dimension on the wood.
The table passed a 300-pound strength test to show it can comfortably carry the extra weight of the pot and its content without breaking. Fixing the Kamado into the circle in the table will require you to dismantle it to reduce its weight. It is also essential to place the grill on a paving stone rather than on wood.
2. Large Kamado Table With Castor’s

Extensive Kamado tables provide enough room to place your meals or make preparations. The Kamado is placed at the center of the 7 feet long table. The frame and table legs are made using cedar which is a durable wood. The castor wheels make the table mobile, so you can roll it to a different location.
The plan is in a two-video series with a third included after a long time for additions to the project. The storage box on either side of the grill are covered with a door to keep the area more organized.
It is vital to follow the exact order of the videos as they show detailed steps from building the frame to addicting the boards and doors. Ensure the base layer for the grill is suitable for your Kamado so that a considerable portion is above the table surface.
3. Kamado Table With Overhanging Shelves

Here is another Kamado table with castors for mobility. The table is for a large grill as it features overhanging shelf areas on either side of the grill. The overhang gives it a unique look and leaves legroom around the table. It has a limited storage section under the Kamado Joe grill.
The table is attached below to ensure the surface is holes-free. It is a weekend project you can complete in a day or two, depending on available time.
Cut the 2×4 for the legs and framing, then assemble using nails and clamps. The legs are made of two 2x4s arranged at right angles for durability and style. Finish the top and body before joining the two parts for a glossy look.
4. Whitewood And Pine Kamado Table

Pressure-treated pine and whitewood are the primary material for this table, with pocket and deck screws of various sizes among the other materials required. Several finishing products like Minwax wipe-on poly, Minwax English chestnut stain, locking casters, table cover, and hooks are used on the table to create an attractive look.
Hooks attached to the side provide places to hang utensils, with the bottle opener adding more features to this simple-looking table design. The table cover ensures the table can sit outside under the elements with minimal damage.
The plan involves a video overview of the process and a more detailed guide in written format. You can select the size of the Kamado you’re building to get the correct dimensions.
5. Double Kamado Joe Table

The plan is for double Kamado Joe grills on a single table with extra space for a comfortable cooking experience. The storage spaces are covered with doors with two end compartments featuring drawers.
Its durability is not questioned, as it can hold large or XL Kamado sizes. Each drawer frame, base frame, back, and shelf for the egg is built differently and assembled using the correct nail or screw. Bumpers are installed under the bottom rack to slightly raise the table and keep it away from moisture.
Pilot holes will make the assembling straightforward and prevent cracking in the wood. Extra braces help secure the table and reinforce its strength. Instead of the regular wooden table top, this plan uses a soapstone countertop for an impressive look and a durable surface that will not be damaged by moisture.
6. Western Red Cedar Kamado Table With Enclosed Storage Spaces

The plan is designated as advanced, indicating it may require highly experienced builders to complete with enclosed storage spaces giving the table a clean look and keeping grilling materials away from sight. The wood that produces such an impressive look is the popular dimensional western red cedar.
Check the guide for a tool, material, and cut list with the sections’ parts. You’ll also find one of the most detailed processes, with over forty steps directing you from the framing phase to finishing.
Use your cutting tools and follow the cut list to make detailed cuts and get the parts for the table. While building the body, you have to take the drawer below the Kamado base and the double-door compartment into consideration.
7. Simplified Kamado Joe Table
The project uses sanded cedar to make the table with varying pieces of 1×6, 2×2, and 2×4 cedar required. You’ll also need screws and stains for the glossy finish that makes for an exquisite look. Four wheels attached to the base of each leg make mobility easy.
The table is deep, providing enough space to prepare and even serve your meals. The open shelf underneath the table is for storing your grilling materials. Finishing the lumber before assembling will ensure all the parts are adequately coated, and the surface gloss is visible.
While the table design is simplified, its guide is less detailed and would require prior experience to overcome the lack of information in some parts. Include stoppers to keep the wheels from moving while cooking.
8. Rustic Table Design With a Side Burner

The originator of this plan wanted to transform the entire space from a boring to a modern space with an impressive rustic Kamado table. While cedar contrasting with the rest of the walls is used to cover the bare walls, a table frame is being built. A retaining wall is built into the slope to prevent soil from falling into the grilling area.
The countertop is 8 ft by 3 ft wide, which is extensive, with enough room for full-scale outdoor cooking. Ensure the top post is set about 1 ½” below the top of the frame to leave room for the concrete countertop to sit inside the frame.
Build the frame for the side burner using a cylindrical structure to create room for the Kamado while setting the concrete top. The front of the table features a false gabion with flat stones creating a natural rustic look.
9. Double Kamado Joe Table With Concrete Top

This video follows the process as the originator builds a double Kamado Joe classic 3s table while narrating the steps. It can comfortably carry two grill pots, while its various storage drawers always ensure space to keep your supplies while grilling.
The Kamado Joe classic 3s are longer than the traditional 2s, so you need to consider this when building the bottom layer holding the Kamado Joe. Making provision of about 17″ clearance for this long grill will ensure it sits at the correct height above the tabletop.
The table is made of concrete to ensure durability, especially under harsh weather. The posts use four-by-four lumber to prevent splintering when nailing. Make lap joints around the frames to glue and screw the pieces for full-strength support.
FAQ’s
Get acquainted with some common challenges by building Kamado Joe tables and simple solutions.
Ans: Building rather than building already-made Kamado Joe tables will allow you to customize the table to your needs while reducing costs.
Ans: You must wear protective equipment when making the table. You can easily injure yourself if you try to carry the Kamado Joe alone without dismantling it and asking for help.
Ans: You can modify an existing table to carry Kamado Joe; however, you must reinforce its frame and ensure it can take the extra weight. You’ll also need to cut the tabletop while making sure the surface has good moisture resistance.
Conclusion
Kamado Joe grill is a popular outdoor kitchen equipment that requires a stand that can hold it, raise it about the ground, and also provide space around it for preparation. Building a table becomes a challenge where the idea is lacking. A guide includes several designs for creating a Kamado Joe table.