A garage is an essential part of your property. It protects your vehicles from weather elements. A well-built garage also gives a boost to your property value. So if you have a home with a garage, expect it to sell fast and at a premium.
First Consideration – Where to Place The Garage?
There is a wide range of choices when it comes to where to place the garage. You can attach it on the side of the house; place it in the front or on the back. The attached garages give you direct access to the house. These are expensive to build than detached garages. The attached garages, however, increase the property’s resale value.
When deciding on the placement, ensure to check the zoning laws of your state. There are restrictions as per the local zoning rules. The rear placed garages have fewer setbacks.
Before You Start
The garage is an extensive structure. You must get the building plan from an architect or a design company.
The exterior design is determined to blend with the aesthetics of the house. It includes the color, roofing, siding, and the window of the garage.
Generally, a two-car garage will be built in 24 feet by 24 feet dimension. There will be one or two doors to enter the garage, a door to enter the house, a window, and a side door to lead to the exterior.
Take care to note that even if you are building the garage yourself, you need to get the building permits. The structure needs permission from the local municipal inspection bodies.
Again you will need varied components in the garage. Electric wiring, lighting, laundry sink, outside hose bib, laundry facilities, and plumbing permits are a few among them.
Rules on The Garage Structure
It is great to have a 40*60 feet garage with 12 feet walls. The local rules, however, bar you from building the garage so tall. There are ordinances on the length and the square footage of the structure.
Here are a few of the standardized rules in most of the states.
- Only some part of the plot should be covered with any additional structure.
- There is a limit on the number of impervious structures that you can build.
- As per many state rules, the garage should be smaller than the size of the house.
Where to Build the Garage?
The state needs to know where you wish to build the garage. To ensure no hindrance in your project, here is what needs to be done.
- Get a survey copy from the state.
- Outline the building proposed on this survey.
- Find at least two relevant property markers.
- Dig a hole and check the soil, it should be solid. You cannot build the garage on spongy soil.
- Discuss the plan with your neighbors.
- If the plan does not conform, apply for a variance.
How to Build a Garage: DIY The Garage Built
1. Plan The Design

There are online sites that give you some excellent garage design ideas. You may choose to purchase an expensive blueprint, but the only thing that the state wants to see is a basic drawing with the garage measurements.
Take care to:
- Match the overhang size, roof pitch, and roofing with the house.
- Place the windows such that you can see people moving in and out of your property.
- Do not place the windows where you wish to install a cabinet.
- The service door should be placed close to the home.
- You may need an extra service door on the back.
- Taller walls accommodate high overhead doors.
- 2*6 walls offer extra space to allow insulation and increase the R-value.
- Position the building such that there are no water issues.
2. Pick up From Various Foundation Options
The kind of footing and the slab that you wish to build the garage on will be determined by:
- Your budget
- The grade
- Garage size
- Soil conditions
If the soil condition is good and not spongy, then pour a slab with a thick perimeter. It is an acceptable and the least expensive option.
Adding a block course to the slab lets the garage door frame far from the ground. It is vital as per the grade. Laying many block courses on the frost footing is an expensive choice. Here you will have to rest the edges on the block slabs. It, however, is a long-lasting and durable choice. Huge garages with deep organic topsoil will use this method as there is a lot of digging.
Consider whether to build the floor with or without slope. A sloped floor lets water and snow run out. If you choose to build a flat floor, design the area close to the overhead in a slope. It will not let the rainwater run back into the building.
It pays to hire professional concrete guys here who know the areas that will need sloping and will build the other areas flat. It does not risk an uneven surface.
The garage will need foundation footers to extend below the frost line. A backhoe digs into the soil in this depth. Wooden concrete is also ideal for building the foundation. Pour concrete on it and leave it to cure.
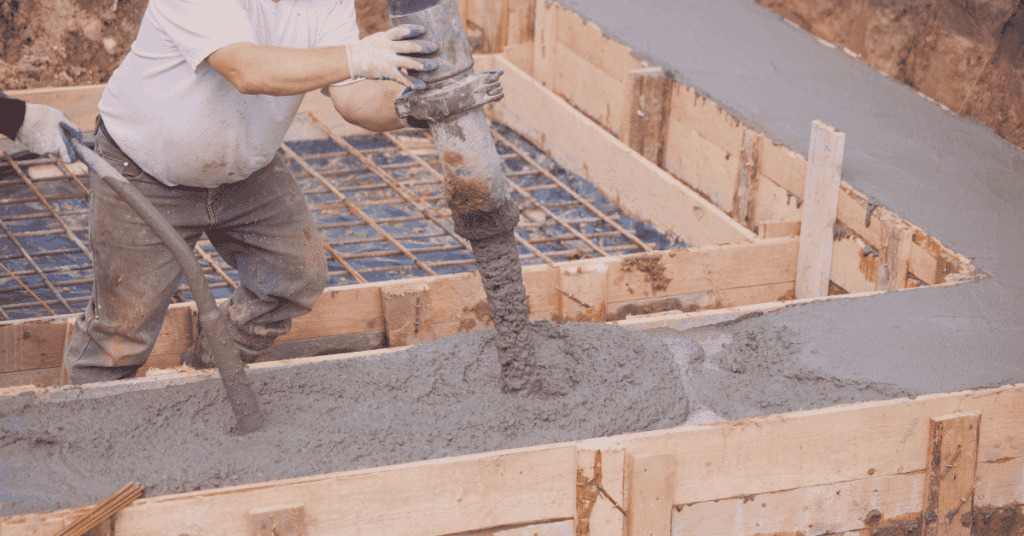
3. Pouring The Slab

You may want to pour the slab yourself or hire a contractor to do the same. Whichever path you choose, your involvement is crucial in this process. And for this, you need to understand the factors involved.
- Proper elevation is a must. Door framing of the wood garage, wood siding, and sheathing should be 6 inches from the final grade.
- The base material should be four to six-inch, well laid, and compact.
- The concrete needs a 4000 psi mixture.
- The pour should not be less than 3 1/2 inches. If you wish to park heavy items in your garage, you need the pour to be even thicker.
- Reinforce with rebar, mesh, or fiber mesh mixed with the concrete
- A sloped floor is a requisite near the overhead door.
- Space the approved plate anchors properly.
- Do not leave more than 12 feet between the control joints.
If you are hiring a contractor, make sure to discuss the following.
- Insulation options
- Floor drains
- PVC pipes installation
- Electrical panel
- Cement sealers
- Inspection scheduling
It is wise to hire a contractor who is well-versed with the local laws and knows the expectations.
Use tied metal rebar to pour a concrete sheet. It is a strengthening base for the slab. A concrete truck will pour the slab continuously. It needs to be screed out to finish the process.
4. Building The Walls and Roof

- Use double sill plates to build the walls.
- Use it on the top as well as the bottom.
- Place vertical studs at every 16 inches.
There should be space between the doors and windows. For the roofs, you can use pre-built trusses. It will need nailing down. This step also involves installing the shingles.
Move from bottom to top with the overlapping roof membrane rolled out horizontally. The step is followed by placing the shingles. Shingles start at the edge of the roof and then move upside in an overlapping row
Exterior grade plywood of ¾ inch is nailed to the outside, covered in a house wrap.
5. Installing The Siding and The Doors
Install the siding on the house sheathing, ensuring that they stylistically match.
You need a door installed between the house and the garage. Install the garage door track on the ceiling. The doors are first placed in the opening and then on the path.
6. Electrical Wiring and Plumbing Lines
The garage should get connected with the electrical system of the house. If your garage will need laundry, tie the plumbing lines with a hot and cold water supply and drainage system from the house. If you need a hose bib, you will need a cold water line tied to the housing supply. It will extend all through the wall to the location of the outdoor faucet.
7. Hanging and Finishing The Drywall
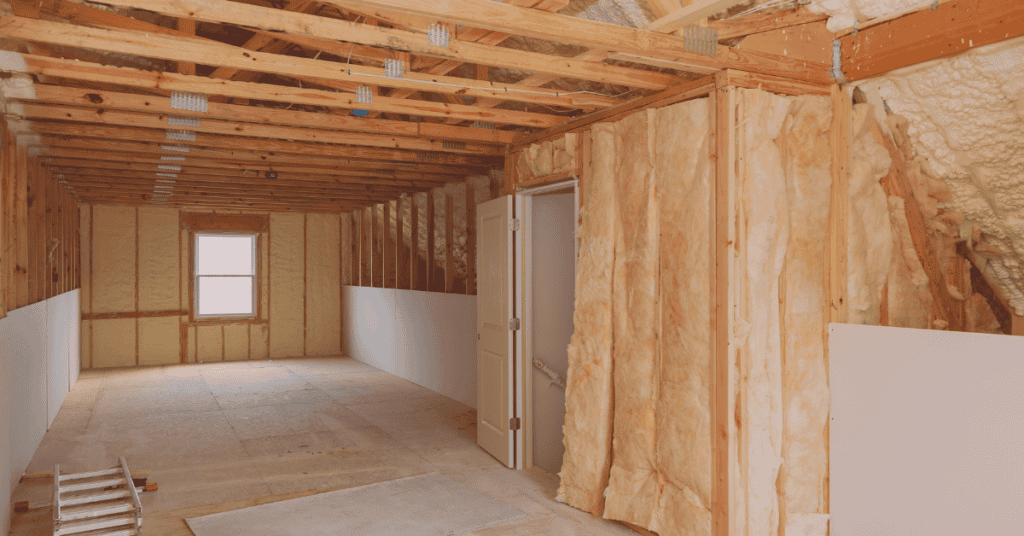
Drywalls need installation on the garage inside. The state code may need special drywall that is fire-resistant on the garage sides that border the house.
8. Ordering The Correct Stuff
Take a close look at the list of materials that you need.
- Long top and bottom plates
- Pressure-treated lumber to use as bottom plates
- It is preferred to use the same sheeting for both the wall and the roof
- H-clips to deck the roof
- Header materials
- Hurricane clips that secure the walls trusses
- Material needed for any overhead door jambs in the garage
Here is a thumb rule to follow:
- You will need one stud for each linear foot to give you enough space for corners, trimmers, cripples, and blocks.
- The treated bottom plate should be the total number of the linear feet plus an extra 20 percent.
- You need extra top plates for blocking and bracing.
- Calculate the number of sheathing sheets by adding the total square footage of the wall area and the overhangs divided by 32. Add a little extra to it.
9. Buying the Trusses
Some may choose to hand-frame the trusses. That does not save you a lot of money but wastes a lot of time. Instead, choose to buy prefabricated trusses which are strong, straight, and easy to install.
10. Optimizing Help
You may call friends to help you with the garage build project. Or you may have hired a crew. Here is how to assign the task such that they match the correct skillset.
- Hauling lumber, crowning studs, fetching fasteners, installing hurricane clips, and lifting walls are best left to a novice.
- Building headers, cutting lumbers and sheathing, and helping with the trusses should be the work of someone with less experience.
- Doing layouts, straightening walls, assembling the door, and window opening are the work of an expert.
Tools and Material That You Need
Here is a list of the materials and tools you would need to build a garage. However, make sure to cross-check it against your plan to avoid any last-minute hassle.
- Air compressor
- Hearing protection
- Hammer
- Tape measure
- Nailer and compressor
- Framing square
- Cordless drill
- Cat’s paw
- Air hose
- Safety glasses
- Circular saw
- Electric saws
- Framing nail gun
- Miter saw
- Two-by-fours
- Brad nail gun
- Chalk line
- Level
- Toolbelt
- Shingles
- Garage door
- Plywood or OSB sheathing
- LVL beam
- Tape measure
- Siding
- House wrap
- Drywall
- Concrete
DIY or Hire a Professional?

How to build a garage? Building a garage is similar to building a house. The main steps like foundation, roofing, and wall systems stay the same. While it is not impossible to build a garage yourself, you need to have enough time in hand and specialized skills, and perfect DIY Ideas, in particular trades of this business. Homeowners may also choose to hire a sub-contractor for a part of the job while they DIY the rest to save on some cost.
Garage building is undoubtedly a serious project, but many advanced DIYers take it up as a challenge. It, however, needs planning, motivation, and knowledge whether you choose to do it all by yourself or hire a contractor for a portion of the job.
Not the DIY Type? But Want to Save Money?
To take over the complete responsibility of building a garage all by yourself is not everyone’s cup of tea. But the idea of saving some money is tempting.
Here is the solution to your problem
- Installing the garage doors, windows, hanging and finishing the drywall, establishing circuits, and running electricity for the house are things that you can manage yourself.
- Building the foundation, pouring the concrete slab, building walls and the roof structure, installing siding and shingles are best left to a professional.
Take over a specific part of the project and outsource the others. This way, you will not just have professional help in the complex building process but also save money when you DIY the less complicated steps.
You May Also Like:

