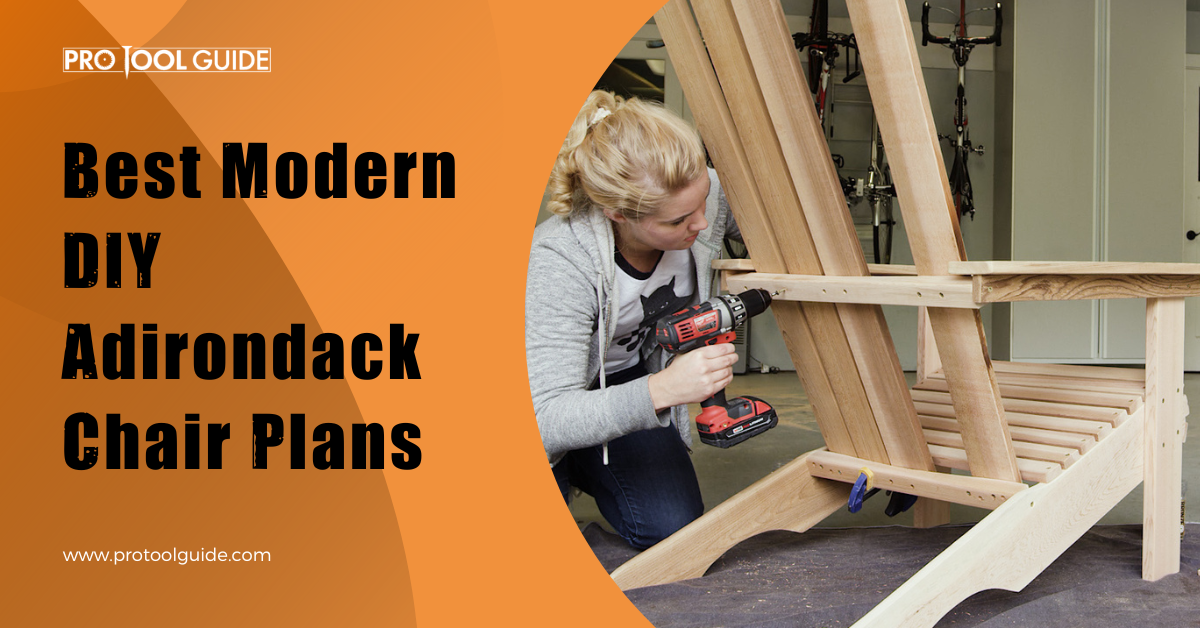
Looking for outdoor seating? Want something aesthetic, yet comfortable? A DIY Adirondack chair is the perfect furniture choice that will not just be unique but will also add the wow factor to your garden.
Adirondack chairs have now long been used as outdoor lounge chairs. Along with being an easy solution to having a seating arrangement in a garden, they also augment the overall vibe of a garden. Hence, if your garden needs a quick makeover, there’s no need to look further.
Modern DIY Adirondack Chair Plans
We have collected 17 classic DIY Adirondack chair plans for you to get inspired from. You will definitely find something that is appropriate according to your taste and preferences. Get ready to come across some of the best DIY Adirondack chair plans!
1. DIY Adirondack Counter Height Chair
[su_row][su_button url=”https://learn.kregtool.com/plans/adirondack-counter-height-chair/” target=”blank” style=”flat” background=”#f29221″ size=”7″ center=”yes” text_shadow=”0px 0px 0px ” rel=”nofollow”]See Full Plan[/su_button][/su_row]
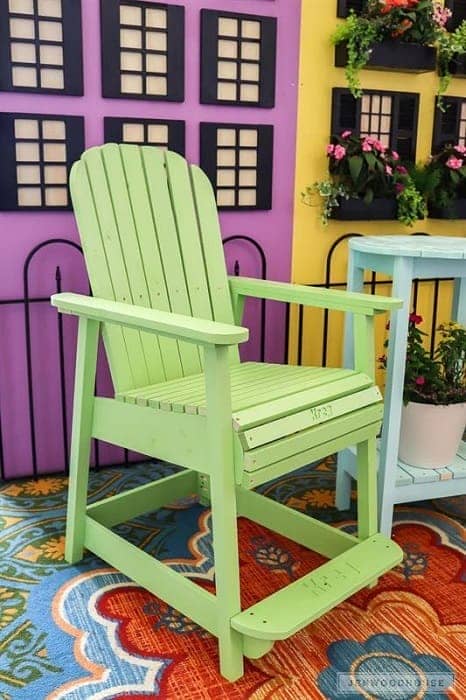
Adirondack chairs are traditionally shorter in height. This DIY Adirondack counter-height chair overcomes that limitation with its tall and comfortable height.
With the added advantages of a footrest, big-enough armrests, curved back, and a sloped seat, this DIY chair is a must-have for any minimalistic garden. The neat and classy structure also makes this one a great pick.
If you are familiar with woodworking, the steps and visual aids in the accompanying guide will be easy to follow.
Pro Tip: Before the final assembly, use a jigsaw to cut the back slats into a curved shape.
Want something to compliment your Adirondack chair? Look for more outdoor wooden furniture here!
2. Comfy DIY Adirondack Chair Design
[su_row][su_button url=”https://www.settingforfour.com/how-to-make-an-adirondack-chair-the-easy-way/” target=”blank” style=”flat” background=”#f29221″ size=”7″ center=”yes” text_shadow=”0px 0px 0px ” rel=”nofollow”]See Full Plan[/su_button][/su_row]
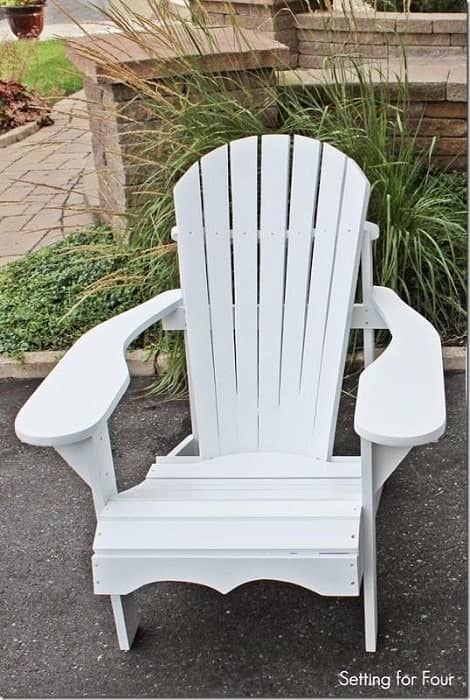
Want to build an Adirondack chair but don’t have enough time? This design can be built over a weekend and is best suited for busy DIYers.
The slightly angled back and ergonomically comfortable seating position make this design the perfect addition to your backyard. Additionally, they are the sturdy type and can be used all year round.
Just gather your woodworking tools and the supplementary materials required and follow the steps mentioned in the guide above.
Pro Tip: When you pre-drill the holes in the wood, make sure to keep them slightly smaller in diameter than the screw to reduce wood splitting.
3. DIY Adirondack Chair Plan
[su_row][su_button url=”https://learn.kregtool.com/plans/adirondack-chair/” target=”blank” style=”flat” background=”#f29221″ size=”7″ center=”yes” text_shadow=”0px 0px 0px ” rel=”nofollow”]See Full Plan[/su_button][/su_row]
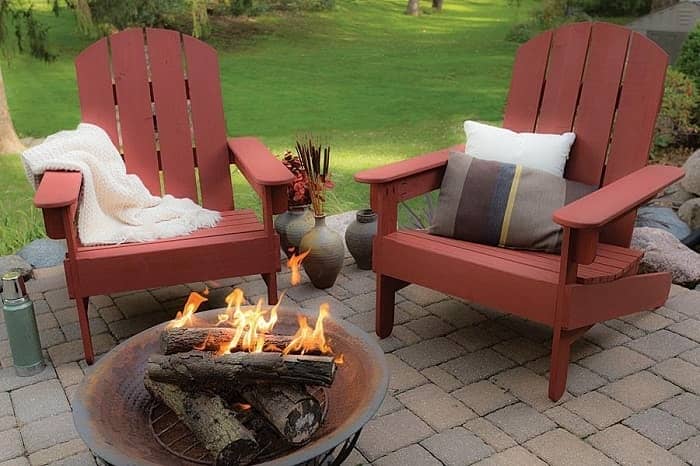
This simplistic design would fit almost any kind of vibe, but if your house and garden have a rustic design, this DIY plan will do justice. Set the chairs up next to a small fire pit in the winters and you’d have a comfortable place on your patio!
The plan lists the required materials, power tools, 3-D diagrams, and detailed instructions. Start with cutting the back legs and move your way up to the back slats and the armrests. Finish off with sanding or staining as desired.
Even with intermediate joinery skills, you will be able to follow along with the steps.
Pro Tip: For ease of assembly, you might want to lay the chair on its side, prop up the back, and install the back slats.
4. Modern DIY Adirondack Chair Idea
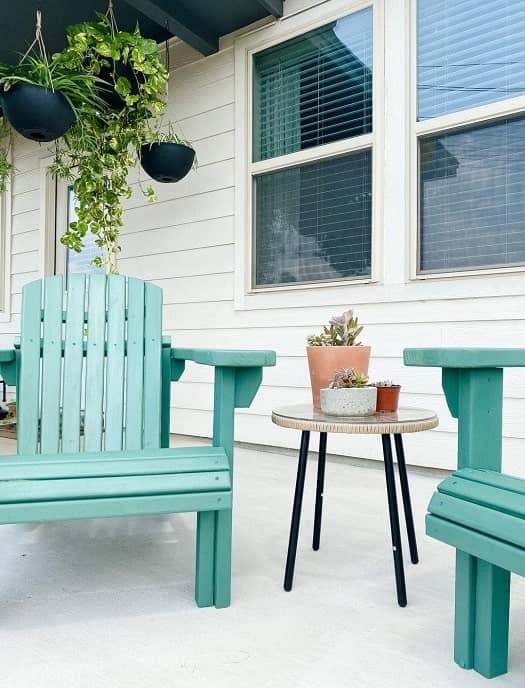
[su_row][su_button url=”https://www.loveandrenovations.com/diy-adirondack-chairs/” target=”blank” style=”flat” background=”#f29221″ size=”7″ center=”yes” text_shadow=”0px 0px 0px ” rel=”nofollow”]See Full Plan[/su_button][/su_row]
For do-it-yourselfers who love a nice pop of color, this idea right here would do the job effortlessly.
The crafter of this Adirondack chair design used templates and a hardware kit that made the cutting, drilling, and assembly process much easier. However, that is a choice you don’t necessarily have to make.
For this project, you will need basic tools including a jigsaw (or bandsaw), an orbital sander, a router, and a drill bit set.
Don’t forget that the templates will be a smart investment if you will be taking up few more Adirondack chair plans in the future. Even better, they are reusable and convenient.
5. DIY Adirondack Chair (featuring a pull-out footrest!)

[su_row][su_button url=”https://www.jackmanworks.com/diy-adirondack-chair-with-pull-out-footrest/” target=”blank” style=”flat” background=”#f29221″ size=”7″ center=”yes” text_shadow=”0px 0px 0px ” rel=”nofollow”]See Full Plan[/su_button][/su_row]
Want an outside lounger chair to relax on every once in a while? Well, we have picked the right option for you!
This DIY Adirondack chair offers an adjustable pull-out footrest, which makes it extremely worthy of all the hard work. The footrest has multiple positions, a curved design for added comfort, and can be collapsed inside the chair.
The original creator used clear-grade Western red cedar lumber. Your choice may depend on personal aesthetic likings and what you have available. The included guide is easy to follow and features a video tutorial too.
Pro Tip: When adding the varnish coats, make sure to let them cure in between and preferably, do it outside to allow ventilation.
6. 2×4 Modern DIY Adirondack Chair Plan
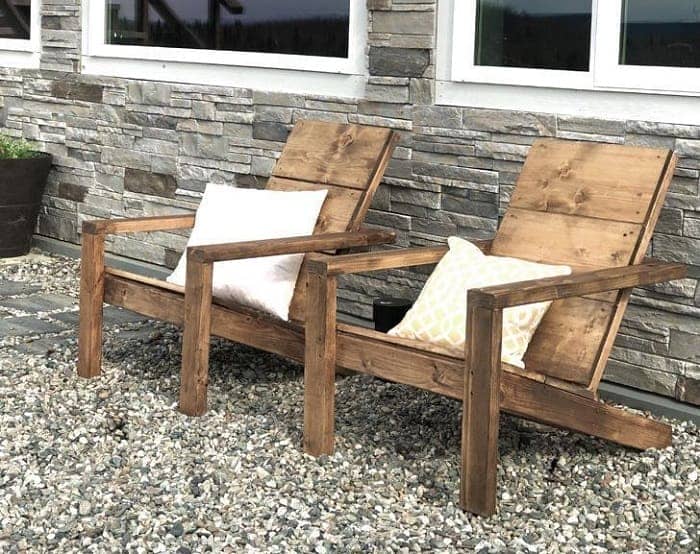
[su_row][su_button url=”https://www.ana-white.com/woodworking-projects/2×4-modern-adirondack-chair” target=”blank” style=”flat” background=”#f29221″ size=”7″ center=”yes” text_shadow=”0px 0px 0px ” rel=”nofollow”]See Full Plan[/su_button][/su_row]
Nothing beats a DIY outdoor chair idea that is cost-effective and offers hassle-free assembly! This suggestion is best if you’ve been looking for something that is convenient and gives off a modern vibe.
This one is also great if you have a fixed budget as it would cost about 30 dollars per chair. Refer to the accompanying guide to check out the materials you will have to gather, the approximate dimensions, and detailed cutting and assembly instructions.
Pro Tip: Use an appropriate exterior finish to ensure increased durability and a glossy finish.
7. Adjustable Adirondack Chair Plan
[su_row][su_button url=”https://www.craftsmanspace.com/free-projects/adjustable-wooden-chair-plan.html” target=”blank” style=”flat” background=”#f29221″ size=”7″ center=”yes” text_shadow=”0px 0px 0px ” rel=”nofollow”]See Full Plan[/su_button][/su_row]
What’s better than an Adirondack chair that’s light and easy to move around? Nothing, apparently. Just combine simple geometry and some woodworking skills, and you’re good to go!
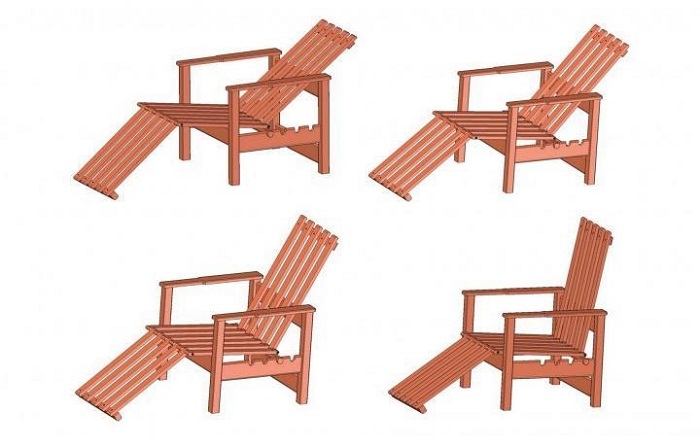
This one is simple to build, requires little woodworking proficiency, and can be made with a few hand and power tools. Another feature of this design is that this lounger is adjustable and can be molded into four positions – from upright sitting to lying down.
The included manual provides sufficient textual material, accurate measurements, and 3-D images facilitating an effortless creating process.
Remember that depending on the type of wood used, the chair might need to be protected against heavy rainfall or extreme weather conditions.
If you are interested in taking up this project, here is a list of must-have power tools for every DIY enthusiast.
8. The Ultimate DIY Adirondack Chair

[su_row][su_button url=”https://www.jackmanworks.com/build-ultimate-adirondack-chair/” target=”blank” style=”flat” background=”#f29221″ size=”7″ center=”yes” text_shadow=”0px 0px 0px ” rel=”nofollow”]See Full Plan[/su_button][/su_row]
This Adirondack chair plan is best for people who are looking for a sturdy and tried-and-tested design. It is made out of clear grain Western red cedar, making it super durable. Stainless steel screws and carriage bolts are used to hold the wooden slats together in place.
The best part about this particular design is that the dimensions of the legs and armrests are flexible. One can use the templates suggested in the guide but also, customize the size according to their requirements.
Pro Tip: While running the router over the curved pieces, pay attention to the rotation and speed of the router to not cause serious tear-out and damage.
9. DIY Shelf-Style Vertical Pallet Garden

[su_row][su_button url=”https://www.fwmadebycarli.com/2020/06/ana-whites-diy-modern-adirondack-chairs-modified.html” target=”blank” style=”flat” background=”#f29221″ size=”7″ center=”yes” text_shadow=”0px 0px 0px ” rel=”nofollow”]See Full Plan[/su_button][/su_row]
This one, out of all Adirondack chair plans, is best for people who aren’t too confident with their skills or are simply running low on wood.
Usually, Adirondacks have elaborate designs with wood slats on the back. But those can often be tricky for beginners. So, this idea simplifies the process and uses two 19.5-inch boards that are screwed to the back support. This not just eliminates the need for excessive cutting, but also uses considerably less wood. Simple, isn’t it?
Refer to the accompanying guide for all other accurate measurements, drawings, the materials required.
Want to freshen up your backyard? Get inspired from these 19 DIY Backyard Shade Ideas here!
10. DIY Adirondack Chair Plan

[su_row][su_button url=”https://www.familyhandyman.com/project/how-to-build-an-adirondack-chair/” target=”blank” style=”flat” background=”#f29221″ size=”7″ center=”yes” text_shadow=”0px 0px 0px ” rel=”nofollow”]See Full Plan[/su_button][/su_row]
Are you a novice at woodworking? Don’t worry! Just diligently follow the plan drawings, measurements, and step-by-step instructions, and your DIY project will turn out great.
For this project, in particular, you can choose among a wide variety of wood options like alder, poplar, aspen, maple, or white oak. Remember that even though softwood will do good enough, hardwood will be a better option in the long term.
After building, you should consider polishing with a wood preservative or a clear outdoor deck finish. View the full plan to read the detailed steps and things to consider.
Pro Tip: If you plan to create more than one hair, it is advisable to cut all the parts together and assemble them later. This will reduce the building time by a considerable amount.
11. Modernized DIY Adirondack Chair Plan

[su_row][su_button url=”https://www.popularmechanics.com/home/how-to-plans/a33323775/adirondack-diy-plans/” target=”blank” style=”flat” background=”#f29221″ size=”7″ center=”yes” text_shadow=”0px 0px 0px ” rel=”nofollow”]See Full Plan[/su_button][/su_row]
This DIY project effectively combines the original Adirondack low-slung comfort and huge armrests look with a modernized slat design. When installed in a front garden or backyard, this one will bring a contemporary feel but will keep the whole American classic aspect intact.
Start by cutting out all the smaller pieces and assemble them all later to avoid having to switch back and forth. Check out the detailed instructions in the guide cited above.
Another thing to consider is the quality of wood being used. We suggest using vertical-grain Western red cedar because of its innate weather-resistant properties. If you use any other kind, invest in a preservative to aid the durability of your creation.
12. DIY Adirondack Rocking Chair
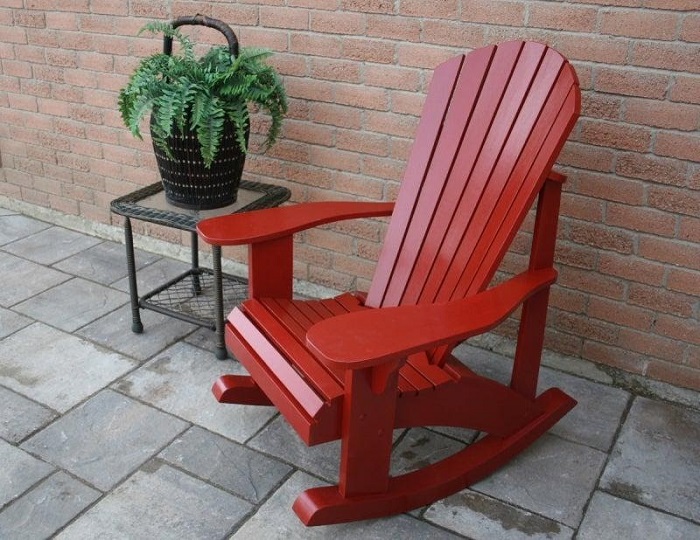
[su_row][su_button url=”https://www.instructables.com/Adirondack-Rocking-Chair/” target=”blank” style=”flat” background=”#f29221″ size=”7″ center=”yes” text_shadow=”0px 0px 0px ” rel=”nofollow”]See Full Plan[/su_button][/su_row]
Who doesn’t love a great rocking chair? But when you combine it with a classic Adirondack low profile seat, the result is a slow and gentle rocking motion that is relaxing, but simultaneously, easy to get out of.
The above plan is elaborate and thoughtful, ensuring comfort. But the best feature is that it is still open to customization and variations.
Depending on one’s height, one can modify the length of the back slats and the height of the seat from the ground. You will require basic (and a few additional) woodworking tools for this project. For all other specifications, drawings, and valuable tips, view the manual above.
Have a love for woodworking? Here are 60 DIY Wood Pallet Projects for you!
13. DIY Vertical Pallet Garden and Green Wall

[su_row][su_button url=”https://www.popularwoodworking.com/adirondack-chair-plans/” target=”blank” style=”flat” background=”#f29221″ size=”7″ center=”yes” text_shadow=”0px 0px 0px ” rel=”nofollow”]See Full Plan[/su_button][/su_row]
If you’re someone looking for a modern but sturdy outdoor chair, check this option out. This Adirondack chair will be a great outdoor seating solution and will also stylize your patio.
The original creators used the cypress medium, a well-known material for outdoor projects. Following the steps in the guide, start by cutting out the patterns to rough sizes and work your way up.
If you would prefer a natural finish, try leaving the cypress unfinished and it will turn from a light brown to a silver-gray.
Pro Tip: Pre-drill the screw holes – it will prevent splitting and will allow countersinking for inserting wood plugs later.
14. DIY Outdoor Modern Adirondack Chair
[su_row][su_button url=”https://www.thedesignconfidential.com/2014/07/free-diy-furniture-plans-how-to-build-outdoor-modern-adirondack-chair/” target=”blank” style=”flat” background=”#f29221″ size=”7″ center=”yes” text_shadow=”0px 0px 0px ” rel=”nofollow”]See Full Plan[/su_button][/su_row]
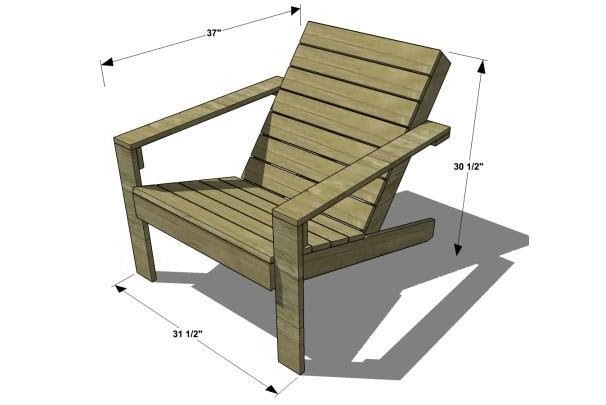
With an estimated cost of around 50 to 75 dollars, this Adirondack design is ideal for those who are on a budget.
To build this one, follow along with the steps carefully. Find all the required materials in the plan above. Since the guide includes 3-D diagrams and corresponding measurements, make sure that the cuttings are sturdy enough before assembly.
For a professional finish, it is suggested to paint or stain the individual sections before assembling. This not just results in a flawless application but also enhances the durability of the piece.
15. DIY 2X4 Adirondack Chair Plans

[su_row][su_button url=”https://www.raisingnobles.com/how-to-build-2×4-adirondack-chairs/” target=”blank” style=”flat” background=”#f29221″ size=”7″ center=”yes” text_shadow=”0px 0px 0px ” rel=”nofollow”]See Full Plan[/su_button][/su_row]
Want a design to match the minimalistic aesthetics of your garden? These Adirondack chair plans are perfect to use for outdoor camping or simply, a fire pit in the winters.
If you take up wooden DIY projects often, you might already have most tools you need. But if you don’t own a Kreg jig or a miter saw, this guide mentions feasible alternatives to those tools. There’s also a video tutorial available!
Pro Tip: Although it is advisable to get treated lumber for the project, in case you can’t, seal the chairs well with stain and sealer products.
16. Easy Modern DIY Adirondack Chair

[su_row][su_button url=”https://rogueengineer.com/easy-diy-modern-adirondack-chair-plans/” target=”blank” style=”flat” background=”#f29221″ size=”7″ center=”yes” text_shadow=”0px 0px 0px ” rel=”nofollow”]See Full Plan[/su_button][/su_row]
This DIY idea blends a modern leg design with the conventional low angles and curved back of an Adirondack. Looks pretty interesting, right? It’s even easier and affordable to build for any weekend DIY’er.
According to the original creator, this project would require around 30 to 40 dollars and would take approximately an hour to complete. So, buy the suitable lumber and get into action!
Also, make sure that the fasteners used are ACQ (Alkaline Copper Quaternary) rated to prevent corrosion.
17. DIY Jet Black Adirondack Chair

[su_row][su_button url=”https://housebecominghome.com/build-modern-adirondack-chair/” target=”blank” style=”flat” background=”#f29221″ size=”7″ center=”yes” text_shadow=”0px 0px 0px ” rel=”nofollow”]See Full Plan[/su_button][/su_row]
Have unwanted lumber lying around the house? Put it into some use with this DIY project!
This project can help in utilizing any waste lumber and is convenient to build. Refer to the included guide to view the details and required materials.
Using a taper jig is worthy if you plan on adding tapers to the legs and back. You can also make the assembly much easier by using a Kreg pocket hole clamp.
Remember to double-check if the quality of the wood being used is appropriate for outdoor use.
Verdict
Adirondack chairs are, in fact, the best way to spruce up the overall visuals of a house. Therefore, if you’ve been wanting to build one, don’t waste more time!
We hope this list of Adirondack chair plans helped you find inspiration. It’s suggested to choose a design and attempt to add your personal touch and create something unique.

